(This post has been updated (2015) to reflect new changes in Blogger templates.)
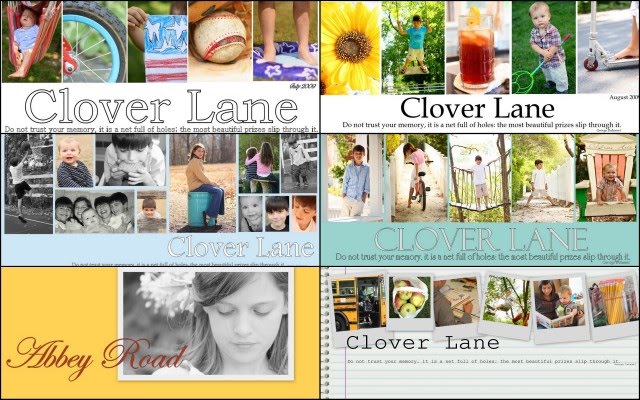 (a few examples of past headers I've made)
I’ve been asked SO many times how I make my collage header (also called banner) images. I came upon this free and easy way to make your Blogger blog look more original and professional...I was desperate and didn't want to pay for a blog designer, and didn't have time to learn Photoshop...I also LOVE the design process of changing things up once a month.
You will want to choose the Simple template in the Design section of Blogger.
I promised a tutorial a long time ago, but knew I’d have to wait till the kids went back to school to spend the time to put on together. So here it goes.
First you need to download Picasa. It’s free and it should be easy to figure out how to get your pictures from your files into Picasa. Picasa is 'made' by Google and it won't make your computer blow up, or slow down, or act really weird...I swear. I really love using it…I’ve tried almost everything, and I think this is the best (and most self-explanatory) FREE editing system out there…especially if you are using Blogger. I am really not very computer savvy, and I don't have the time to learn Photoshop right now, try as a might. So I've squeezed every ounce of juice out of Picasa and have been very happy with the results.
Once you download Picasa, it is easy to figure out how to 'Import' (there's a button) your pictures from your files into Picasa. (You can do them a file at a time just to see if you like it.)
SO, let’s say you are in Picasa and you want to select 4 or 5 pictures (you will see, once you experiment, that a header can be made with a bunch of photos or just one and still look good).
 You are going to select a photo and press the Collage button on the bottom of the window. (You can edit your pic first if you want....see the left hand side for tons of options.)
 In the Settings choices, you will choose Picture Pile because it allows you to work with a bunch of photos and manipulate them around in tons of ways.
  Click and hold on your photo and drag it to the corner (or wherever you want it). (By the way…you can see that you can select different colors for the background…experiment away…the possibilities are endless. Also under background options you can select "Use Image". You can download free scrapbook paper and import that into Picasa and use that as a background image if you want something besides a solid color. I did this from here. You will see in my September banner I have chosen a pattern, but the one I have for August I chose a white background.)
  See that little grey circle on the photo? That allows you to make the photo bigger or smaller and also allows you to manipulate the angle…crooked or straight, and allows you to move it everywhere. If you look in the Settings box, you can also chose to add a white border, or a Polaroid border, or create a shadow on your photo.
 Now you want to add more pictures. Click Clips right next to Settings. If you don’t see the photos you want to add go to Get More and it will take you back to your Picasa files. Click on your pictures there and then go back to the Collage file on top…see that button…next to Library. The picture you clicked on will show up in the little Collage window. Press the + button and it will be added. If you change your mind click on the photo you don’t want and press Remove. (You can also press View And Edit if you decide you want to use some of the cool editing features in Picasa to make your picture better-looking.)
 For this example, I am lining up my photos as straight and evenly spaced as I can get them. Remember, the possibilities are endless though...they don't have to be straight. I DO try to keep them on the top 1/2 of the collage..yes, it looks funny at first, but you want your collage to be long and skinny..you will crop that bottom half off later, after you add text. Just work with the top 1/2 when making a header.
 When I’m set I press Create Collage.
 That brings me back to the main Picasa page. I find my created Collage in the Library file, and click on it. Now what comes up is the basic editing features…Basic Fixes.
 I find the Text button and press that…there you have TONS of choices of type. Play around and see what you like best…this is the “funnest” part…you can move the text where ever you want (even on top of the photos), make it whatever size you want (keep it on the page!), pick the opacity of the text, and determine the color you want it…it has the same grey circle that you manipulate around. Remember though…you want it rather long and skinny like a header normally looks so keep it up there in the 1/2 of the space provided.
 If you want to create a whole different grouping text, you can do that too. Just click the phrase you are finished with and move your cursor to a new spot…it doesn’t have to be the spot you want the type to show up, because remember…you can move it. Now you can choose the color, font and size of your new phrase.
 After you have your words down, click the Apply button and you will go back to the basic Edits. You are going to Crop your Collage so it looks like a header, not a huge photo, so press Crop. I make it really even on all sides and bring the crop right up under the writing.
  Press Apply when you are finished.
 You are going to Export (see that button on the bottom?) your collage to your photo files. When you press Export a window like this will show up. That little slider bar lets you choose the size.
I used 800 for my banner.


NOW, go to your blog and press the Layout tab. Press Edit on the header part (where your title is.) Choose your Image (your collage) from your Files where you sent it. Make sure you press the “Instead of title and description” button first, and make sure the Shrink To Fit button is NOT checked before you upload your picture.
 Press Save. If the Collage seems too big for you, just resend your collage at the next smaller size when Exporting to your photo files from Picasa.
If the blog banner isn't centered, you will need to go into the Template, go to "Customize", find Advanced, scroll down to CSS, and copy and past this code to the CSS:
#header-inner img {margin: 0 auto;}
Press Enter (you can see your blog header move to the center after pressing Enter) and then Save.
Here's some great advice: Start a new blog...a sample, "fool around" blog, and just try stuff out on it. Google some tutorials...that's how I learned. In your Settings, you can choose to make that Sample Blog private, and hide it on your profile so no one sees it. Then play away! You can see how things look on your Sample Blog first, practice, and then try it out on your new blog.
Check out these cute headers made from this tutorial:
I'm so proud of you! (and I'm proud of me too, for actually explaining something and having it make any sense for once.)
Melissa's
Tawny's
Rachel's
Jennifer's
Beth's
Mandy's
Abbey's
Donna's
Casey's
Jodi's
Lindley's
Jaclyn's
Kelly's
Vicki's
Jenny's
Sara's
Cheryl's
(If you have one you would like to share, leave a comment below!)
 (a few examples of past headers I've made)
I’ve been asked SO many times how I make my collage header (also called banner) images. I came upon this free and easy way to make your Blogger blog look more original and professional...I was desperate and didn't want to pay for a blog designer, and didn't have time to learn Photoshop...I also LOVE the design process of changing things up once a month.
You will want to choose the Simple template in the Design section of Blogger.
I promised a tutorial a long time ago, but knew I’d have to wait till the kids went back to school to spend the time to put on together. So here it goes.
First you need to download Picasa. It’s free and it should be easy to figure out how to get your pictures from your files into Picasa. Picasa is 'made' by Google and it won't make your computer blow up, or slow down, or act really weird...I swear. I really love using it…I’ve tried almost everything, and I think this is the best (and most self-explanatory) FREE editing system out there…especially if you are using Blogger. I am really not very computer savvy, and I don't have the time to learn Photoshop right now, try as a might. So I've squeezed every ounce of juice out of Picasa and have been very happy with the results.
Once you download Picasa, it is easy to figure out how to 'Import' (there's a button) your pictures from your files into Picasa. (You can do them a file at a time just to see if you like it.)
SO, let’s say you are in Picasa and you want to select 4 or 5 pictures (you will see, once you experiment, that a header can be made with a bunch of photos or just one and still look good).
 You are going to select a photo and press the Collage button on the bottom of the window. (You can edit your pic first if you want....see the left hand side for tons of options.)
 In the Settings choices, you will choose Picture Pile because it allows you to work with a bunch of photos and manipulate them around in tons of ways.
  Click and hold on your photo and drag it to the corner (or wherever you want it). (By the way…you can see that you can select different colors for the background…experiment away…the possibilities are endless. Also under background options you can select "Use Image". You can download free scrapbook paper and import that into Picasa and use that as a background image if you want something besides a solid color. I did this from here. You will see in my September banner I have chosen a pattern, but the one I have for August I chose a white background.)
  See that little grey circle on the photo? That allows you to make the photo bigger or smaller and also allows you to manipulate the angle…crooked or straight, and allows you to move it everywhere. If you look in the Settings box, you can also chose to add a white border, or a Polaroid border, or create a shadow on your photo.
 Now you want to add more pictures. Click Clips right next to Settings. If you don’t see the photos you want to add go to Get More and it will take you back to your Picasa files. Click on your pictures there and then go back to the Collage file on top…see that button…next to Library. The picture you clicked on will show up in the little Collage window. Press the + button and it will be added. If you change your mind click on the photo you don’t want and press Remove. (You can also press View And Edit if you decide you want to use some of the cool editing features in Picasa to make your picture better-looking.)
 For this example, I am lining up my photos as straight and evenly spaced as I can get them. Remember, the possibilities are endless though...they don't have to be straight. I DO try to keep them on the top 1/2 of the collage..yes, it looks funny at first, but you want your collage to be long and skinny..you will crop that bottom half off later, after you add text. Just work with the top 1/2 when making a header.
 When I’m set I press Create Collage.
 That brings me back to the main Picasa page. I find my created Collage in the Library file, and click on it. Now what comes up is the basic editing features…Basic Fixes.
 I find the Text button and press that…there you have TONS of choices of type. Play around and see what you like best…this is the “funnest” part…you can move the text where ever you want (even on top of the photos), make it whatever size you want (keep it on the page!), pick the opacity of the text, and determine the color you want it…it has the same grey circle that you manipulate around. Remember though…you want it rather long and skinny like a header normally looks so keep it up there in the 1/2 of the space provided.
 If you want to create a whole different grouping text, you can do that too. Just click the phrase you are finished with and move your cursor to a new spot…it doesn’t have to be the spot you want the type to show up, because remember…you can move it. Now you can choose the color, font and size of your new phrase.
 After you have your words down, click the Apply button and you will go back to the basic Edits. You are going to Crop your Collage so it looks like a header, not a huge photo, so press Crop. I make it really even on all sides and bring the crop right up under the writing.
  Press Apply when you are finished.
 You are going to Export (see that button on the bottom?) your collage to your photo files. When you press Export a window like this will show up. That little slider bar lets you choose the size.
I used 800 for my banner.


NOW, go to your blog and press the Layout tab. Press Edit on the header part (where your title is.)
 Choose your Image (your collage) from your Files where you sent it. Make sure you press the “Instead of title and description” button first, and make sure the Shrink To Fit button is NOT checked before you upload your picture.
 Press Save. If the Collage seems too big for you, just resend your collage at the next smaller size when Exporting to your photo files from Picasa.
If the blog banner isn't centered, you will need to go into the Template, go to "Customize", find Advanced, scroll down to CSS, and copy and past this code to the CSS:
#header-inner img {margin: 0 auto;}
Press Enter (you can see your blog header move to the center after pressing Enter) and then Save.
Here's some great advice: Start a new blog...a sample, "fool around" blog, and just try stuff out on it. Google some tutorials...that's how I learned. In your Settings, you can choose to make that Sample Blog private, and hide it on your profile so no one sees it. Then play away! You can see how things look on your Sample Blog first, practice, and then try it out on your new blog.
Check out these cute headers made from this tutorial:
I'm so proud of you! (and I'm proud of me too, for actually explaining something and having it make any sense for once.)
Melissa's
Tawny's
Rachel's
Jennifer's
Beth's
Mandy's
Abbey's
Donna's
Casey's
Jodi's
Lindley's
Jaclyn's
Kelly's
Vicki's
Jenny's
Sara's
Cheryl's
(If you have one you would like to share, leave a comment below!)
If you want to get a little more creative with different fonts and scrapbook paper backgrounds, or are interested in making scrapbook pages with Picasa HERE is a great tutorial.
If you are still confused, HERE is a great step by step video series of tutorials on making collages with Picasa that can help you get started.


Hi there! First of all just want to say that I read your blog and think you are a great mama! (and I think your fam is beautiful!)
ReplyDeleteSecond of all, T H A N K S for your post..YOu were awesome explaining how to create a new header and walking us through step by step! I DID IT! and I am NOT computer savy. thanks thanks! thanks....
(I've almost payed someone to do my header but saw your post and read it over and over till I figured it out! you did such a great job!)
www.tawnyandryan.blogspot.com
Thanks again, Tawny
Thanks for the tutorial. I'm downloading Picassa to give it a try!
ReplyDeleteThanks, Sarah. I've been using Picasa since you recommended it and we like it. I learned something new today from you - that you can rearrange picture pile. I always wondered how you got your 5 photos straight across! Great info.
ReplyDeleteYay! Great tutorial. Thank you so much! That pesky border around my header has been driving me crazy! I'm eagar to give picasa a try now too!
ReplyDeleteThank you so much for creating easy-to-understand directions - and with pictures too! I look forward to giving it a try.
ReplyDeleteTHANK YOU!!!! I have Picassa, but have only used it a few times. :) I've been trying to figure out how to save a photo so I can access it elsewhere in My Documents. Wonder how good their "Help" section is.... :)
ReplyDeleteDear Sarah-
ReplyDeleteBless your dear , sweet heart. I can only imagine how busy you are right now.
I paid someone to re-do my blog a while back because I had NO clue how to do any of this.
I found the most reasonable person I could find.
I love how yours looks- and although I don't always comment, I read yours every single day.
My favorite all time photograph is the picture of your little one after everyone had gotten on the bus. It was priceless.
Thank you Sarah for sharing with all of us.
Laura
Thank you! I am going to play around right now and see what I can do.
ReplyDeleteThis was a great step-by-step. Love it!
Melis
Thank you so much! I've always wondered how you did your great looking header. I can't wait to try it!
ReplyDeleteThank you for this! It is initially a bit scary for me, as it's somewhat techie - but you make it seem pretty manageable.
ReplyDeleteMy husband swears by Gimp photo editing. Ever heard of/tried it? I know he's used Picassa, as well.
Also, I found the easiest solution to getting rid of that danged border on Blogger. (Found it on one of those nerdy blogging blogs.) Go to Layout and then scroll down to border color. My background is white, so I selected white as my border color and it magically disappears! This may not work for people with fancy, patterned backgrounds, but worked like a charm for me.
Oh yes, Sarah - I can tell that you are not computer savvy in the least! Thanks for the advice! I love your banners! Your photos are always so beautiful. You really should consider turning it into a business!
ReplyDeleteWhat a great tutorial! I use Picnik, and it's easy, free, and pretty. I adore that you change your banner every month, btw.
ReplyDeleteHave a wonderful week!
XO*Tricia
Cool! I use Picasa to manage all our photos and love it. I may have to give this a try. Thanks for the tutorial!
ReplyDeleteThank you! Thank you! Thank you! I'm going to give it a try. You make it sound pretty easy.
ReplyDeleteholy cow! i think i was one of the people who asked...i pieced something together after spending HOURS trying to sort through all the info out there...I'll save this post for when I want to change out my pics!!! (cuz there's no way i actually remember what i did the first time. plus, i'm thinking i could improve mine TONS now that i actually have someone telling me smartly what to do!!!)
ReplyDeleteTHANK YOU!
You rock!! Thanks so much for getting to this post! I cannot wait to get to work on this! How fun!! Really appreciate it--thanks!
ReplyDelete:) lindley
No way!!! Ok, I have not even read this post yet or the comments but I just had to say THANK YOU! Isn't Picassa free? I have been wondering how to make a banner forever!!!! Yea!!!
ReplyDeleteYou are such a brilliant gal - thanks for sharing your knowledge!
ReplyDeleteKate
Great tutorial ! I mean really,really great ! Thank you for all the details. I need details !!!
ReplyDeleteCan't wait to try it.
Thank you for this! I've always loved your banner and enjoy reading your blog. I'll have to try this, when I have some time. :-)
ReplyDeleteI love that you change your banners frequently. How creative is that? Your photos are gorgeous. Thanks for the tutorial. I hope it works ok with Typepad. I'll be experiementing soon. :-)
ReplyDeleteWOW, this is so very helpful. I think my header may need some refreshing ;)
ReplyDeleteTHANKS!!!!!!
OMGOSH! I actually did it! I followed your directions to a "T" and it worked! This helped me tremendously! I feel like I have a new bloggie life!! You are a Rock Star! Seriously, I am so grateful! Thank you! You are amazing! Do you need some more accolades? Would you mind if I linked this tutorial on my blog?
ReplyDeletewhoa! had lots of friends request help now on a header... I send them to your post....KUDOS again and thanks! Tawny
ReplyDeleteThis was excellent! Thank you for taking the time to post this! Happy Days! jen
ReplyDeleteHi Sarah! I'm currently on a blog break...ya ya ya whatever. you know I love a great tutorial. I also use Picasa to do my headers, but I love seeing your method. Thanks Sarah! ...for sharing.
ReplyDeletePS. I love the current header. I have a thing for lined paper. :)
okay, so you cleared up a lot of my few remaining questions about headers. i always used picnik, but the possiblities with picasa's collages is much greater. thanks! my idea was back-to-schoolish, too. check it out! and, thanks again!
ReplyDeletehttp://www.oddgirloutblog.blogspot.com
Who knew it was that fast- I've been using MS Digital Image Pro 10 - it is fun to use but Picasa seems a WHOLE lot faster! Thanks :) I made the header up there in about 4 minutes - and it looks like it took me 4 minutes - LOL better one to come once I snap more photos!
ReplyDeleteOh thank you thank you! I used your tutorial on making a banner and it turned out beautifully! You are a peach! I am NOT technical, but you made it possible, please check out my humble little blog and give me your feedback.My blog wants to be like your blog when it grows up! Thanks so much!!!Jodi Whitehead
ReplyDeletehttp://thebarefootshutterbug.blogspot.com/
Thanks so much for letting me know how to get that stupid border off of my header! It's what my blog has needed for a long time!
ReplyDelete-Jill
Ugh! I will conquer this...or you could come to South Florida and do it for me :)
ReplyDeleteI finally did this!!!!!!! So excited. Thanks a million.
ReplyDeleteSo stinkin' cute. Thank you!
ReplyDeleteTHANK YOU!!! I was able to figure this out with your help. It took an hour and a half, but I did it!! Woohoo!!
ReplyDeleteCome check out my blog:
abeachylife.blogspot.com
Oh...here's mine...3maamsandtheirguy.blogspot.com
ReplyDeleteYay! Thanks for the help! I did it! :) Now I think I will play around with it more.
ReplyDeleteA friend of yours on Ravelry directed me to your blog and I'm so glad she did! Your explanation on how to make a header was just what I was looking for. I'm ready to download Picassa and make my own header on Blogger. Thank you very much!!
ReplyDeleteYay for me! I just made a simple new header. Again thank you so much. Your directions were very easy to follow.
ReplyDeleteGoogle SHOULD have paid you to say that. And I've actually been really surprised at the quality of work I've done in Picasa. I guess because it's free I discount its abilities. Silly me.
ReplyDeleteWell I finally made a header all by myself...thanks for the great directions...Hope all is well.
ReplyDeleteGreat info . . . now if I could just find where to put it. I have the photos in a collage but my template does not have the same wording that you say to look for.
ReplyDeleteAccording to me Google picasa is a good image editing software and by using this software we can make a blog header picture but there are some effects you can only give in photoshop and other image editing software like coreldraw.
ReplyDeleteOh btw, I just did collages for our beach house trip and it was so easy! Didn't quite realize I could create so many fun collages and post them. It is a great way to consolidate 200 plus pics and make it simple and cute!
ReplyDeleteso thanks again, Tawny!
OH MY GOD! THANKS SO MUCH, THIS TUTORIAL IS GOING TO PUT ME IN THE BEAUTIFUL BLOG LEAGUES! IM NOW ELEVATED, AND I NEVER KNEW THAT I COULD DO THIS MYSELF! I HAPPEN TO HAVE PICASA AND NOW I KNOW WHAT TO DO! INTERESTING THAT I JUST SPENT THE AFTERNOON UPLOADING MY PICTURES INTO MY PICASA ALBUM. THANKS, THANKS, THANKS!
ReplyDeleteThat was so much easier than I thought it would be. Took me a little while, playing around, but I have a cute header now. I've so been wanting to use a different background picture, but I only had one that would work for the header. I'm hoping to change it seasonally, now that I know how easy it is. Thanks so much!!! Please do come see (when you have a chance.) :)
ReplyDeletethank you SO much for posting this... it helped a lot...
ReplyDeleteyou can check out the banner I made here:
http://cre8tiveqt.blogspot.com/
and I cropped it down for our etsy store...
www.cre8tiveqt.etsy.com
You great great lady! This post was super helpful! Giving it a try as I already love Picasa. Will let you know the results. I am also going to follow you as your blog is amazing....Thank you!
ReplyDeleteBest Regards from the UK
Deb
I imagine this comment is going to get lost in the sea of other comments, but this tutuorial is amazing! I'm still struggling a bit with figuring out how to do this (impatience has it's price) but love your idea of a practice blog! Thank you !
ReplyDeleteLiz
Thanks so much, I've been wondering how people make those really cool headers.
ReplyDeleteUr tutorials are awesome!!!! I made my first blog header!!!! SOOOO excited to play around with it more and see what else I can come up with!!!! Here is the one I created so far.
ReplyDeletehttp://jennking-mylife.blogspot.com/
You are the best! I can't believe I was able to do this. I did my header tonight, but it needs some work. But, wow! Thanks for being so helpful...
ReplyDeleteI LOVE YOU!!! Thank you so much for this tutorial! I just finished mine and I love it! I did a fall theme so I will be changing it in a couple of months. I was seriously thinking I was going to have to pay to make over my blog. God bless you! {Feel free to link mine up.}
ReplyDeleteI now have a new Banner (THANK YOU!) and I mentioned you in my post, today.
ReplyDeleteThanks!
http://www.TheOldPostRoadBLOG.blogspot.com
-Trish
Not sure if I ever sent you email with my link, but I love, love, love your easy tutorial on blog headers.
ReplyDeleteI have received so many complements on mine.
Thank you
Stephanie
I just completed mine, too. Thanks so much for the tutorial!! You can check it out at seanandcindy dot blogspot dot com.
ReplyDeleteI've finally gotten around to walking through your tutorial. It was very clear and thorough so thank you! I've added my first header but after looking through other readers' examples, I need to get my creative juices flowing. I love Abbey's header, by the way!
ReplyDeleteThanks so much for your tutorial! I'm home sick today and you provided the perfect low-energy activity for me to do so I didn't have to do laundry and bills :) You walked me through it so easily and wala! I love it!
ReplyDeleteLisa
I am so glad I stopped over here from Ann's (Holy Experience)! I have so enjoyed exploring your place. What a talented and beautiful lady you are! I have been playing around with this tutorial...so much fun! I have made my blog a little header, but I"m still playing. Thank you so much for sharing this. It really does make it much easier!
ReplyDeleteMy friend Merle posted your blog on Facebook and I am so glad she did! I have been wondering how to do a header on my blog and this morning, thanks to your tutorial I did it! It took three tries but finally got what I wanted . Thank you so much. It is at poeticpumpkins.blogspot.com if you care to see.
ReplyDeleteGreat tutorial! I followed it step by step....I rushed it a bit. I'm so excited to know how to do this now! I'm still tweaking it, but it's so much fun. Thanks!
ReplyDeleteThank you sooooooooooo muuuuuuuuuuch. I had downloaded Picasa recently because I really like collages and playing with photos but do not have the budget for Photoshop type thingy but I can now use it in my header. You are a star. Thank you again. Be blessed.
ReplyDeleteI can't thank you enough for this great tutorial - so simple and helpful, I couldn't have fixed my blog without you! I think you've build up some good karma with this post!
ReplyDeleteHi,
ReplyDeleteThis is an excellent article. I usually don’t post on blogs but ya forced me to, great info.. excellent! I will add and bookmark your site. And i will follow you in future. Thank you!
Thank you so much for doing this tutorial. I already use Picasa for editing my photos, so I was excited to learn how to do a collage.
ReplyDeleteI made a new header for my blog. It's not really a collage, but I love it!
Kara's Kitchen Creations
With your step-by-step directions, my blog header has a new look for the first time since it started almost 2 years ago. Thanks SO much!
ReplyDeleteThanks so much for sharing this -- your instructions were AWESOME!! I, also, don't have time to master Photoshop or any other photo editing program. I've been using picasa for the last couple of years and clearly wasn't using it to it's potential! Thanks for shedding some light on ALL it can do! :)
ReplyDeleteone more thing -- where did y'all get your cutsie lil' dots... embellishing could really make this addicting :)
ReplyDeleteI just found your blog today from today's creative blog and it's the most fun I've had in a while! (reading your blog that is) I was wondering if I could link this post to my sidebar under blogging 101 tips. It would be very helpful for many people! Thanks for brightening my day!
ReplyDeleteThank you so much! I already had picasa but had no idea all the great stuff I could use it for. I am getting so much more use out of it now. I just did our family Christmas Card with it. And it's all free!!
ReplyDeleteThanks again for sharing!! Did this immediately the first time you shared, forgot to save this post or the instructions anywhere, but just came back again, scrolled through all your posts until I got back to this one so I could refresh myself on the course. gonna save it this time, but so easy to do, just wanted to say thanks!!!
ReplyDeleteThank you so much for this post. After several attempts, I made a header for our blog using this tutorial...and I love it! Thanks!
ReplyDeleteMelinda
After downloading Picasa I had ago and after my son tweaked it a bit for me, I came up with this:
ReplyDeletewww.crafting4greyhounds.blogspot.com
Its not perfect but not bad for my first attempt and heaps better than it was. Thanks so much for the great tutorial.
I just found this today!!! You are fabulous. Now I have to figure out how to make my blog into a 2 column. I think that's what I'm trying to do. :)
ReplyDeleteThis has been on my to-do list for awhile, and I finally did it. Thank you for the inspiration and the tutorial:)
ReplyDeleteFirst, thank you for the tutorial. I just *knew* I could do a custom header w/o paying someone. :)
ReplyDeleteSecond, I made a "jpeg" collage in Photoshop Elements. I am having a hard time getting it to load though. I know you said you don't know PS, but would you have any advice on this?
Thanks in advance!
Late to the party but I found your tutorial via Centsational Girl. I've just uploaded a new banner (full of my pics of Christmas lights) just in time for Christmas. Thanks for the help - I'm loving it
ReplyDeleteHoly Cow! This worked!!!! You have no idea how grateful I am....thank you so, so much! Merry Christmas!
ReplyDeleteI just made myself a new header today. I've been using Picasa for over a year and never noticed the collage feature! DUH! I think it turned out pretty well. Thanks for the tutorial!
ReplyDeletehttp://theyellowfrontdoor.blogspot.com
Wow! Great tutorial, I am horrible at these sorts of things but I was able to make a banner and I got rid of that horrible border the title thingy! Thanks!
ReplyDeleteThank you so much for explaining all this! I searched high and low for something as well explained as this! Thank you!
ReplyDeleteThanks so much, your instructions were great and easy. Check out my banner at www.homedecorbudgetista.blogspot.com
ReplyDeleteThank you so much for your explanation. It worked out perfect. I have used it several times. Your tutorial on how to make your pictures bigger is wonderful also! :)
ReplyDeleteThis is awesome! I have been using Picasa for so long and never knew I could do this! I love it! Thank you so much for the tutorial. Made perfect sense! http://thefriedelkids.blogspot.com/
ReplyDeleteI have admired your blog headers...and your photography...for awhile now. Thank you for taking the time to write such an easy-to-follow tutorial for us! I have had so much fun this evening creating several headers...one for my main blog, another for our lake house blog and one for the future! Now if I could only take photos like you do...then I'd be set!! Blessings!
ReplyDeleteI am a huge fan of picasa and have been reading your blog for quite a while, thank you so much for this. i paid for a blog design over a year ago but got tired of it after all this time so i finally tried this and it was SO easy! thanks so much i love my new spruced up blog!
ReplyDeleteThanks for the tips! Very helpful! Can anyone tell me how to make my pictures NOT have a border around them, or a white background?
ReplyDeleteThank you so much for this! I plan on going back to spruce mine up a bit, but I've spent way too much time already on it. Apparently, I saved mine too small...Next time : )
ReplyDeleteThanks for this!
http://spsquared.blogspot.com/
Thanks so much! I followed your directions and had no problems at all! I have been trying to learn how to do this for some time now.
ReplyDeletesunshineinthehouse-angie.blogspot.com
All I can say is ... WOW and THANK YOU!!
ReplyDeleteSuch a GREAT tutorial - it took me less that 1/2 hour from start to finish!!! And now I am loving my blog. Can't wait to play more.
hi, just wanna say thank you so much for this great tutorial, I'm going nuts how to make my own then I found your blog, thank you thank you hahaha, you're an angel, just finished my very first header,and I still wanna make more hahaha.take care=)
ReplyDeletejust tried it out! Thanks! this is great and super cute. also, thanks for your how to paint furniture tutorial. even things that seem so simple need instructions for girls like me! :) trying to talk my husband into letting us paint our dining room furniture!
ReplyDeleteNice tutorial - this was so easy! I'm getting ready to start blogging, and thanks to your inspiration I've decided updating my banner regularly will be a great compliment to my blog plans. Thanks so much for sharing!
ReplyDeleteThanks so much for the great tutorial. I love how it truned out ;)
ReplyDeletehttp://starcottage.blogspot.com/2010/01/time-to-retire-old-blog-banner.html
Awesome tutorial, so easy to follow! I am going to enjoy playing with this so much! Thank you, thank you, thank you!!! www.givesaidthelittlestream.blogspot.com
ReplyDeletethanks so much for this. I just had a blast making my own. www.seakettlediaries.blogspot.com. I can't wait till next month! :)
ReplyDeleteJennifer over at Tatertots and Jello forwarded this tutorial to me and all I can say is thank you thank you thank you! I refer back to it quite often and although my blog is still a work in progress, I am certain it will look as sharp as yours does!
ReplyDeleteI just found a link to this post and made a header of my own! Thanks so much. The directions were easy to follow and I love my new header!!!
ReplyDeleteI used it, and it was quite simple. Thanks for sharing!
ReplyDeleteThank you!!!!
ReplyDeletehttp://colopyfam.blogspot.com/
I use picasa and had never figured out how to do this!
Thank you for this, I have not done it yet but will give it a try. Just another tip on the Nav bar. Just click on edit on your navbar and you can now make it TRANSPARENT! No more blue or black navbar's. And it will always match your background. Neat Huh?
ReplyDeleteSharon
Just found you from Sneaky Mom Jill!!! THANK YOU!!! I did it and it only took about 45 minutes while my daughter napped!!! I was so excited I had to share it with all my peeps!!!
ReplyDeletehttp://tessastidings.blogspot.com/2010/02/new-lookwith-little-help-from-some.html
This comment has been removed by the author.
ReplyDeleteGood post. I am a fellow diy blogger. I have recently been introduced to picnik and that has helped me in my quest for spicing up my blog as well. I started making picasa headers a few months ago. Check it out.
ReplyDeleteCute header, btw.
i tried it! i did it!!! thank you so much...it really was so easy! i never would have figured it out...but i just kept going back to the tutorial!
ReplyDeleteThanks so much for this! I found you from Sneaky Mama. It was so easy to understand- thank you!
ReplyDeleteIt was so easy thanks to your instructions. Thank you very much!
ReplyDeletehttp://rejoicingevermore.blogspot.com/
This was so helpful. Thank you so muchhhhhhhhhhh
ReplyDeleteWhat a great tutorial and just what I needed! I found your post from Sneaky Momma Blog Design too. I'm going to get started right away. Thank you!!!
ReplyDeleteThank you so much. I just finished my Blog Banner and I love it. I am new to this whole blogging thing and this was just what I needed. Thanks so much.
ReplyDeleteGREAT tutorial! Thanks for sharing!!!!
ReplyDeleteI've been using Picasa ... FOREVER ... but I didn't know that Picture Pile function could be used like that! I also avoided it because I didn't like how the photos overlapped ... now I am slapping my forehead for sure! Thanks :)
ReplyDeleteI DID IT TOO! Thank you so much. Your tutorial was excellent walking me through it. I came close to tears at one point, but that was because of my error and getting side-tracked from your advice. I am so excited - I made my own header! I also love the rest of your blog too!
ReplyDeletewww.doodlebugdrama.blogspot.com
I was referred over to this post from Sneaky Momma and could just come through the screen and kiss you. I just replaced a fine collage, but I was aggravated that I couldn't change the font (other than what blogger provided). It's a tad rough, but a fun 1st start! Woo Hoo!
ReplyDeleteThanks for the wonderful tip! I just made a header and had no idea it was that simple. My blog is www.lanceandmandy.blogspot.com
ReplyDeleteI have been thinking of re doing my-header for sometime but did not really get around to doing it. But when I saw Sneaky Momma's post referring your blog, I decided to make the change now.
ReplyDeleteBut I have a little problem, my header is to the left, and I would like to have it centered but don't now, maybe you can check out my blog and make recommendations. Thanks.
Thanks for posting this awesome tutorial!!!
http://passforphoto.blogspot.com/
Thank you!!!! I love my new banner!!
ReplyDeleteThank you so much for this! I just made a header for my blog and I'm playing around with Picasa now! I had no idea Picasa could do so much - I was ready to pony up for Photoshop and now I don't have to!
ReplyDeleteWHEW! You've given me a workout and I think I've done it correctly. I couldn't get the white border removed though...it's taken me three hours to get this far and that a huge chunk of time. I can only imagine how long it took you. Thanks so much for the instructions and I've signed up for your updates.
ReplyDeleteThat's next on my "to learn" list...learning how to put in that little box so folks can sign up for updates.
WHEW!
yea..... I did it.. but I used Creative Memories program...to cool.. thanks
ReplyDeletewww.littleredheartfromgod.blogspot.com
thanks so much...
Connie
thank you so much for this post! it has literally transformed my blog and i am loving it...! so easy to follow!
ReplyDeletehttp://missbblogs.blogspot.com
Thank you so much for posting such easy to follow instructions! I have wanted to do this for so long, but didn't know how. Thank you so much! I can't wait to try it.
ReplyDelete1st time here. Yea..... I did it. Thank you..thank you..thank you.
ReplyDeleteTHANK YOU!!!!!! I love it! I had soooo much fun building a beautiful collage header! I am not very computer savvy...so thanks again. I am so proud of it! www.savingyourhardearnedmoney.blogspot.com
ReplyDeleteThank you so much for explaining how to do this. Only and I both redid our Banners and are pleased how well they turned out. I just have to figure out how to move my banner over just a smidgen and it will be fine.
ReplyDeleteI did it!! So excited!! But, I used Picnik, which is similar to Picasa (and also now owned by Google as well). Thanks SO MUCH for the info about how to remove the border lines too. This is great!
ReplyDeleteamandajillsblog.blogspot.com
Thanks,
Amanda
thank you I FINALLY have a header on my blog and it looks good thanks to your instructions...
ReplyDeleteI used your tutorial today and was able to make a great header! Thank you so much for the easy instructions. I also have really enjoyed exploring your site for new ways to improve my blog-- Im a blogger newbie :)
ReplyDeleteThanks
I found a link to your blog from Sneaky Momma Blog Designs and I'm so glad I did! This was a great post and I just made my first header with Picasa. It was so easy with your tutorial! Thanks so much!!
ReplyDeletewww.wrightysreads.blogspot.com
Thank you, thank you, THANK YOU! I've been wanting to do this for so long but never could figure it out. I can't tell you how much I appreciate your tutorial on this! I did it! It's still a little wonky because I have to play with the width and get it just right but it's almost there! :) A million thanks from one very happy blogger.
ReplyDeleteThank you so much for taking the time to do this! I love your blog and just made the cutest little header for my own! Thanks again!!
ReplyDeleteI'm having lots and lots of trouble and want to pull my hair out! Could someone please come to my rescue? My crop and my text is not sticking when I upload my image onto blogger. And there is a HUGE white box. I had to just use the blogger way of adding my title to have something on there til i figure it out... www.coriberg.blogspot.com
ReplyDeleteJust finist my blog header, thank you for your explanation ;0)
ReplyDeleteI love it!
Have a great weekend ;0)
Janneke X
Yay!!! A friend just put me onto your tutorial - I'd been using photoshop up until now and it took me AGES to put anything together. This way? 5 variations in 30 minutes. You're a legend! :)
ReplyDeletewww.t1mommy.blogspot.com
what an awesome tutorial! thank you SOOO much. i just made a blog header for my blog using your tutorial this weekend. love it :)
ReplyDeleteFantastic tutorial! So glad I found it and risked burning out a few brain cells to try it. I am definitely tech-challenged, so I'll be the first to admit that if I can do this, anyone can. And faster too, I'm sure! Please come see what you helped me make!
ReplyDeleteThank you soooooooo much for this tutorial! I made a banner for my photo blog!
ReplyDeletehttp://amyb-photography.blogspot.com/
That you for this tutorial from the bottom of my heart. :) It was easy, awesome and I'm so very happy with the results. Please go take a look at my blog header now. I'm soooo thrilled, and its because of this generous tutorial you posted.
ReplyDeletehttp://mimitoriasdesigns.blogspot.com
Gretchen
Thanks for the tutorial! I finally switched up my blog and used this technique to make the header. Cool!
ReplyDeleteOh, thank you, thank you, thank you! I love my new header!
ReplyDeleteSuper easy! Thanks for this.
ReplyDeleteOh my, you made it so easy! Thanks a ton!!!!!
ReplyDeleteThanks for the brilliant tutorial- I've just knocked up a header for myself in about half an hour! Itching to keep playing now!
ReplyDeleteThanks so much for this awesome tutorial. Just used it today, and I love my header. You're the best! You can see my blog here: http://quiltedcupcake.blogspot.com
ReplyDeletethis is awesome! thank you very much. :)
ReplyDeleteYay! I made new fancy headers for both of my blogs! Love them!
ReplyDeleteHere's my public blog:
http://www.smartbottomenterprises.blogspot.com/
Thank you!
THANK YOU!!!!!!!!!!!!! I found you through Sneaky Momma Blog Designs and found her through Cheryl at She Stamps! AWESOME!!
ReplyDeleteI just redid my banner - and not too bad for not knowing what I wanted to use. Now I will put this in my favorites and come back to it time and time again.
Thank you so much for helping novices like me. I hope to be able to pay it forward to someone else.
Thanks again!!
Maria
Thanks for the tutorial. I am just starting to really get into blogging.
ReplyDeleteThis will help me out alot.
thanx a lot 4 the tutorial...now i've already got a new header for my blog...awesome!!!!
ReplyDeleteafter this i can change my blog header once a week :-)
Thank you so much. This tutorial will pretty much change my life. I've been pulling my hair out with all of the other photo-editing software out there (you know, without taking the plunge on getting a Graphics Design degree, or, breaking down to purchase and learn Photoshop!!). This is a huge help!
ReplyDeleteYour tutorial is awesome! I have whipped up a few different banners and love each one! Thanks!
ReplyDeleteOMG!
ReplyDeleteI could just kiss you!!!!!
Here is my *New* blog!!!!
Woo to the Hoo!!!!
=)
http://somethingfromcassie.blogspot.com/
Thank you, thank you, thank you. I am so computer challenged but even I have made a cool banner for my blog.
ReplyDeleteThank you for helping me get the header I want! You rock! http://overatthelittlehouse.blogspot.com
ReplyDeleteLove the header tutorial thank you.
ReplyDeleteThank you so much, I had so much fun with Picasa! Thanks for the tutorial, that was great!
ReplyDeleteWow, THANKYOU!!!!! Fantastic tute, I love my new banner, and it only took me maybe half an hour to create from downloading Picasa to publishing it on my blog!! :)
ReplyDeleteYour the best! I always wanted a good header on my blog..and because of you and your great tutorial I have it!
ReplyDeleteThanks so much!!!!!
I've been using Picassa for a while for photo editing but never thought to use it for my blog. I LOVE the header I made following your directions. Amazing! Thank you so much. That Army Wife Life
ReplyDeletehiya!
ReplyDeletethank you for taking the time to write this tutorial (and in plain English no less). I have now changed my header to something i like very much. AND i have downloaded and will continue to use picasa (you're right; it IS so much easier to master than photoshop and a lot quicker too for the kind of things i do).
anyway, just wanted to join the grateful :)
take care.
thank you for this tutorial. my banner added the POP i wanted in my blog and i'm so happy! thank you!
ReplyDeleteyour blog is so nice. adding it to my roll!
jules
Thank you for this tutorial!!!! I did my first blog header with pictures!!! Thanks for your help!
ReplyDeletewww.thisoldhouseinnewliberty.blogspot.com
A H.U.G.E thank you for this tutorial. You made everything seems so easy and indeed it is. I made my first blog header today after 3 years of blogging. Feels ecstatic. :) :)
ReplyDeleteBest,
Siri
Thank you! Thank you! Thank you! I did it! I now have a new blog header because of your super easy instructions. I even shared a link to your tutorial on my blog:
ReplyDeletehttp://scrappindanielle.blogspot.com/2010/08/welcome-new-blog-header-my-picasa.html
You were such a great help! Thanks again!
Thank you so much for this tutorial! I'm so excited about my new header and a whole new look for my blog! Check it out here: http://bookwormtobombshell.blogspot.com/
ReplyDeleteThanks again!
Thank you so much!!! I used your tutorial (like a Bible) to make my Etsy banner. Granted, it took me about 5 hours but I did it myself. The best part is that it looks pretty much what I would have paid something to do for me. I can't believe it. I'm embarrassingly tech-challenged so I'm very proud of myself right now and I will sleep well tonight. Thanks again. You're the best.
ReplyDeleteThanks a ton! Love this site, as it is sooooo very helpful.
ReplyDeleteCheck out my success with making a blog banner with this tutorial. I love it!
http://mimitoriasdesigns.blogspot.com/
Gretchen
Thank you, thank you, thank you!
ReplyDeleteThank you so much for this turorial! I was up until almost 2:00 AM playing with my new banner. I love it! You can see it at http://yolanda-imaginemakeshare.blogspot.com/
ReplyDeleteThank you so much for this tutorial... it helped to much! You are so talented! I just have one question - How can I make my header bigger? When I export it to a bigger size, it isn't centered when I upload it to the blog. Any ideas?
ReplyDeleteThank you again!
Janice
http://thenorthens.blogspot.com
Hi there!
ReplyDeleteI did it too!! Please come visit me and take a peek :)
http://ayankeequilter.blogspot.com/2010/09/so-happy.html
Many thanks from a computer illiterate blogger! I was able create a header from your terrific tutorial! I blogged about it today and linked to you.
ReplyDeletehttp://myeverydaygraces.blogspot.com
THANK YOU, you rock. Check it out...lilisbuzz.blogspot.com
ReplyDeleteThanks for showing how to do this. I am sharing this post with my readers.
ReplyDeleteThank you so much for sharing this! I am definitely going to share with my readers! marissadg.blogspot.com :)
ReplyDeleteI have been trying to figure out the headers for weeks now! Thank you so much for making this so easy!
ReplyDeleteYour instructions were SO clear and easy. You are amazing! I had been trying to do a custom header for weeks! Thank you. I'm assuming this is the same process that others use when they do a group of photos (side-by-side) in their posts?
ReplyDeleteYou are AWESOME!!! Thank you thank you thank you! I never knew Picasa could be such a great substitute for PhotoShop and be so easy, too.
ReplyDeleteI'll be linking back to you for sure... for myself and for anyone who needs clear, easy instructions.
http://mommyslittlemonsterblake.blogspot.com/
I just made a holiday header for my blog .... Thank you so much for your instructions, I tried doing it on my own ... but your step by step really helped.
ReplyDeleteHave a great holiday.
Thanks for introducing me to Picasa. I used your tutorial to make my header... I think it turned out great! So thanks again!
ReplyDeletehttp://dannyandginapalmer.blogspot.com/
Thank you so much. I just completed my first collage header.
ReplyDeleteI also did a blog post on your tutorials. Thank you for sharing!
http://alltheproofineed.blogspot.com/2010/12/making-digiscraps-using-picasa-free.html
Thanks SO much for your tutorial on the blog headers. Fab, easy to follow instructions. While I'm here - thanks for all the other doses of inspiration here on your blog too.
ReplyDeleteI've been trying to make a new header for my blog all afternoon. Your tutorial was very helpful, but I never could get the size right. I ended up using Paint.net along with the collage feature of Picassa. Thank you!!!
ReplyDeleteThanks for the super easy tutorial. I've always wanted to cute header and now I do! Thanks so much.
ReplyDeletehttp://mamarockwell.blogspot.com/
If I can follow your directions on technical stuff, Harvard should hire you to teach! Many, many thanks for the tutorial on making the blog header...and your blog. LOVE IT.
ReplyDeleteThank you sooooo much for the tutorial! I actually did mine in photoshop but had no idea how to get it onto my blog without your help! I've read your blog for a couple years now but am just now getting mine going... Love your down to earth, tell it as it is style! Thanks for all the great info!
ReplyDeletehttp://gilliganchronicles.blogspot.com/
I know that this post was from over a year ago, but it totally just helped me creat by own header for the first time!! Well written and SO helpful. Thanks!!
ReplyDeleteYou rock! Thank you for sharing. Check out my latest blog. http://mindy-thislittlelightofmine.blogspot.com/
ReplyDeleteDon't know if you're still adding people's blogs but I did it too. I moved to blogspot and revamped thanks to your inspiration and since then it has made me want to write so much more because my blog now has a beautiful home - thankyou!!
ReplyDeletewww.fullhands.blogspot.com
Thank you! Thank you! Thank you! I just put it up. Let me know what you think. I am no expert and relatively new to this whole blogging stuff but I hope to get better as time goes on.
ReplyDeletewww.chasinghoneybees.blogspot.com
Wonderful tutorial and so easy to follow. Thank you, I now have a header that I love and the ability to change it whenever I want.
ReplyDeleteJust did a blog post about it with links back to you.
http://deeznews-dee.blogspot.com/
Thank you so much! But mine is all fuzzy!!! What did I do wrong?
ReplyDeletehttp://householdcents.blogspot.com/
Thank you so much for this tutorial!!! It was super easy to follow (and fun to read as is your blog!) & i'm not so computer savvy!! I can't wait to play around with this more! I also added a link to you into my new blog post about it. Any tips on how to make my header appear more clear on my blog? It looks a bit fuzzy & blurry when I imported to my blog.
ReplyDeletefor nearly 2 days I was working on this and finally got it down! Blogger is having a blurry issue so you have to upload your photo with photobucket first and direct link it up to your blog. Many Many Thanks!!!
ReplyDeleteThank for the help!! This was so fun and easy! But my headers looks really dull and not as clear as the ones on here..what am I doing wrong! PLEASE HELP!!
ReplyDeleteNicole (shauntae friend)
mrsnicolek@yahoo.com
ooops for got to leave my blog link : http://foryoursisthekingdom.blogspot.com
ReplyDeleteThanks again!
I LOVE, LOVE, LOVE your blog! I finally just started my own and I used your Picasa tutorial to create my banner. Thank you so much - I would have never figured this out on my own. The first post of yours that I ever read was the one about being crabby on the weekends and I could so relate! Sometimes I just want everyone to go back to work and school (where they belong) and let me have MY house back : ) ! Thanks for being such an inspiration!
ReplyDeleteThank you, thank you, thank you! I have been looking all over for a step by step process. You pretty much did the header for me. I just pushed the buttons~ aimee
ReplyDeletehttp://www.thependantstudio.blogspot.com
Oops... I was so excited about my new Header I think I left the wrong blog name!
ReplyDeleteThe right one:
http://www.pendantstudio.blogspot.com
Can you tell I am a "newbie" blogger? lol
thanks, again ~aimee
Yay! Thanks for that great tutorial. I just had a blast making mine!
ReplyDeleteThank you SO SO SO much!!! I fiinally made over my blog...all by myself! I couldn't have done it without you. I can't wait to make lots of headers.
ReplyDeletecheck out my new blog!
www.aprilshowers.blogspot.com
Thank you again!!